


4 Steps to Building a Radiology Room Fit for X-Ray Equipment and Accessories
Building an X-ray room must meet safety regulations to protect staff and patients. Learn the correct X-ray room design requirements, equipment, and accessories for your business.
Whether you’re creating an entirely new radiology room or updating an existing one, installing the correct X-ray machine system, equipment and accessories rely on meeting the initial X-ray room design requirements. Follow this step-by-step X-ray room guide to installation, complete with radiation regulations, X-ray equipment and accessories.

Step 1: X-Ray Room Design Requirements
The first step to designing an X-ray room is understanding what type of X-ray equipment you are using and the level of radiation it will omit for each procedure.
Contact an RPA
Before starting your X-ray room build or upgrade, you must contact a Radiation Protection Adviser (RPA) for official health and safety guidance regarding ionizing radiation regulations. HSE provides more details on the rules and regulations of radiation via the Approved Code of Practice.
Dimensions
We recommend the average X-ray room size to be 16 m2. These dimensions facilitate a spacious area to ease workflow while providing optimal patient comfort.
Specific radiology room recommended dimensions consist of the following:
- Mammography X-ray room – 10 m2
- Dental X-ray Units – 12 m2
- General radiography and fluoroscopy – 20 m2
- CT – 25 m2
Location
If possible, locate your X-ray room on the ground floor of the building to avoid any radiation travelling below.
Control Console Area
This area is designated for radiographers and operators during X-ray procedures. The floor dimensions should be no less than 1.5 m x 2 m. The control area will contain a screen for operators to monitor the X-ray procedure clearly but from a safe distance.
The shielded screen must have a protective lead equivalent to the rest of the console area. Depending on the type of X-ray procedure, the screen will have varying lead glass or lead acrylic thickness:
- General X-ray and fluoroscopy – No less than 1.5 mm
- CT – No less than 2 mm
- Panoramic/cephalometric/dental computed tomography – No less than 1.5 mm
- Intra-oral dental X-ray – No less than 1 mm
- Mammography – No less than 0.8 mm
The protective screen will have to offer more protection if the control area is not positioned at least 2 m away from the X-ray machine and maintain a height of at least 2 m.
Walls
Appropriate protection for the walls must extend from the floor to a height of no less than 2 m. All joints should overlap alongside any necessary lead lining.
Various recommended shielding for protective X-ray room walls includes the following:
- General purpose radiography and fluoroscopy – The primary wall thickness should be 320 mm solid cement before a secondary layer of 230 mm.
- CT – The minimum wall thickness must be equivalent to 320 mm of concrete or a solid cement block.
Mammography
- Lead – 0.5mm
- Plasterboard – 25.4mm
- Concrete – 100 mm
Don’t forget to consider the following:
- Intra-oral dental unit – Requires two layers of standard plasterboard at 15.88 mm thickness each or a standard concrete wall.
- Panoramic and cephalometric dental unit – Opt for lead thickness equivalent to 1.59 mm or a standard concrete wall.
- Dental CT – The surroundings for the entire room needs to consist of 0.79mm lead or a normal cement/concrete wall.
Doors
Doors must provide a solid barrier with lead lining necessary for radiation protection. X-ray room doors can also include lead-lined windows.
All doors should consist of no less than 1.5mm of protective lead. However, an X-ray room door for mammography procedures can be equivalent to 1mm of lead or 25.4 mm of solid wood.
Windows
Shielded windows need to contain lead glass or lead acrylic in the form of double glazing. Window framing should also be shielded with relevant lead equivalent thickness and protected by lead blinds or shutters. As for unshielded windows, we recommend positioning them at least 2 m above the ground.
Ceiling and Floor
If it’s not possible to build your X-ray room on the ground floor, then ensure the floor has a thickness of 200 mm of solid concrete. Apply the same thickness to the ceiling to achieve sufficient shielding.
Step 2: X-Ray Machine Installation Procedure
During the process of designing the X-ray room, always incorporate the specific X-ray machine into your dimensions. The ideal position for your X-ray machine is against a protected wall with at least 2 m of space between the machine and the control area.
X-Ray Machines
Wolverson X-ray provides a comprehensive range of high-quality X-ray machines, all of which can be specially selected and expertly fitted for your X-ray room requirements:
Medical Imagining
For reliable and precise medical imaging equipment, we recommend our range of Arcoma products, Arcoma Precision i5 and Arcoma Precision

Dental X-Ray Machines
We offer advanced image quality and versatility across our selection of Dental X-ray machines:
Direct Digital Radiography
Wolverson supplies direct digital radiography equipment suitable for public and private healthcare sectors.
Fluoroscopy X-Ray Machines
Wolverson X-ray Limited provide specialist fluoroscopy machines across the UK, including the NHS and private healthcare providers:
Our fluoroscopy machines provide a continuous X-ray image, providing a full video view with digital capability in fixed or mobile capabilities.
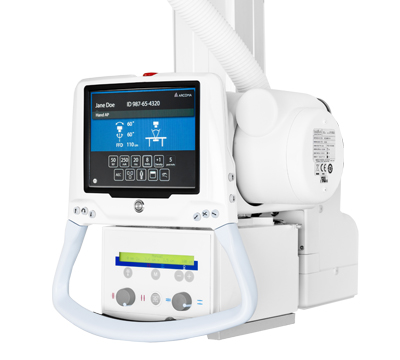
Portable X-Ray Machines
If you require mobility and flexibility with your X-ray procedures, we have a range of portable X-ray machines available:
- Avanse DR – Digital Radiography Retrofit
- MEPX – Portable X-Ray Systems
- Vision M – Portable X-Ray System
- PHOENIX 3000 – X-Ray System for Hand Surgery
Veterinary X-Ray Machine
Step 3: X-Ray Equipment and Accessories
At Wolverson X-Ray Limited, we also provide a range of medical imaging accessories to enhance your X-ray room to optimal performance. From grids and encasements to image scaling and positioning aids, discover our selection of medical imaging equipment and accessories to upgrade your X-ray room.
Step 4: Hire a Company to Build Your X-Ray Room
The final step to finishing your radiology room is hiring a team to fit it to perfection. At Wolverson X-Ray Limited, we have the skills and experience to build your ideal X-ray room from scratch, whether you require an advanced new construction or an upgraded retrofit.
Established for 85 years, we’re an industry-leading supplier of X-ray imagining solutions across multiple industries. Contact us today and we can begin to discuss how we can build the perfect X-ray room for your business.
And to stay in touch with the latest company and industry updates, follow us on LinkedIn.